[NOTE: If I'd had letters with a slant on the left side that I'd wanted to keep slanty, I'd have joined the background inbetween bit to that left side of that letter, rather than to the right side of the previous letter.]
At this point all the letters had to have their sides straightened. They were already the same height, but didn't need to be the same width. But to make them join up properly, they had to have straight sides. There was an exception to this rule on the bottom row. I liked the slant on the little t and wanted to keep it and the little b had a wide bit of letter fabric that I could cut into. So I placed the t overlapping the b, and sliced, following the edge of the t, so that I had matching angles.
I joined all the letters in a row together. A couple of times I did a bad job with my quarter inch seam allowance and ended up with rows that had a V-shape. Easy enough to remedy - I just resewed to get a straight seam. Now I'm not saying the row has to have a perfect straight edge - it doesn't. But Vs aren't good either.
After the letters were joined, I sewed a 2" background to the first and last letter of each row. The next step was to sew a 7/8" strip between each of the rows, but not the top and bottom cuz I was going to sew wider strips there. I sewed with all the seams on top so that I could make sure they were sewn down the way I wanted them to lay. Whenever I hit seams that run sort of parallel to the edge (I get those a lot), they have a tendency to pull away from the presser foot. So I have to go a bit slow and get them back where they belong.
You'll notice that the rows tend to bend down in a bit of an arc. Don't worry about it - that will go away or at least decrease as soon as there is a seam on the other side of the row. Also, at least when I do this, I get a bit of a wavy edge where my seam allowance hasn't been consistent, where there have been bunches of fabric in the seam. This also isn't a big deal, at least if you're using skinny in between row strips like I am - it all comes out in the wash.
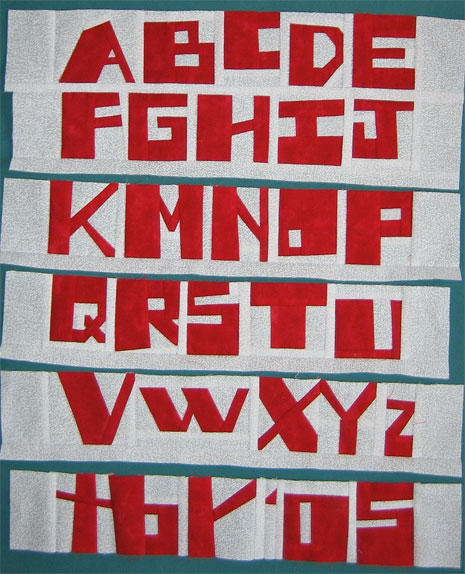
In this first photo, the top two rows are joined together, the next three have their inbetween strip sewn on, and the bottom row is all by itself.
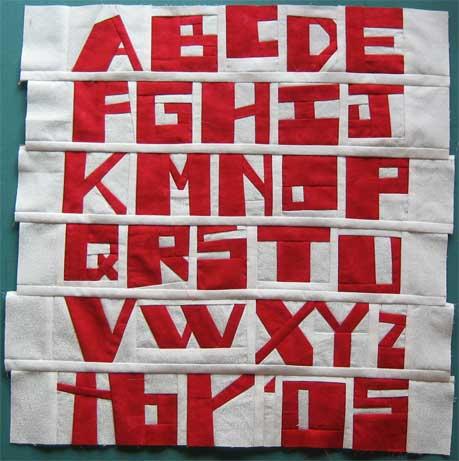
Next is a photo of all the rows joined together. By the way, you'll notice that I didn't decide on a set length for these rows and precut them. Instead I folded each row over, matching the beginning and end of the letters, and marked the "middle" that way with a pin. I joined "middle" to "middle" and didn't worry about the actual length of the row.
 The next step was to even up the sides of this piece. I wasn't measuring, just trying to get it straight, and all lined up with the shortest row on each side.
I did end up having to whack a bit off the bottom row, where the '05 was sticking way down. I wouldn't have minded if there was a straight, angled line across the bottom, but that was a bubble. I then sewed 2" strips of b-fabric to the top and bottom.
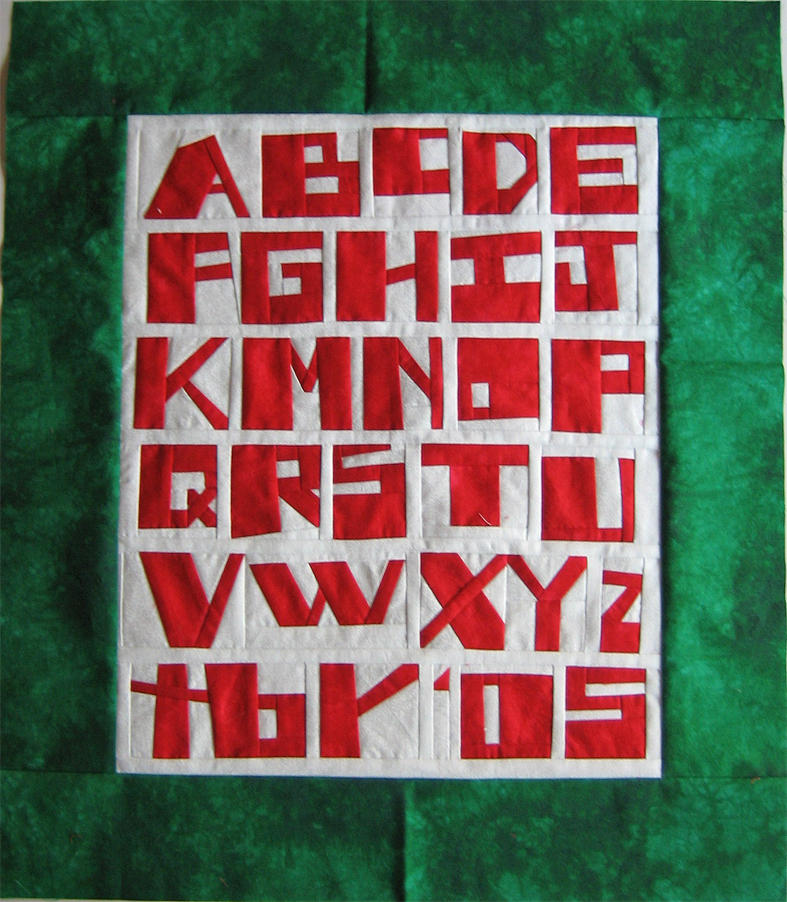
So that's that, the middle bit is done, now all that is left is the border. I consider adding a tiny red accent border, followed by the wider green border. No. I decide on a 3" finished green border, since 3" is more or less the size of the letters along with a bit of the background. I cut out the border strips and lay them down surrounding the letters.
Ugh. I was hoping for a cute small quilt and that is just not what I am getting. So after all that sewing on of extra background fabric, I decide I don't like it and whack down all the sides so that I'll end up with roughly 1/4" worth of background after I sew on the border. That did the trick. I hated all that extra white, but removing it makes the quilt look cute again. The top is 20" by 23".
So here it is, the finished sampler quilt top. If you double click on the photo, you'll get a really good large picture of it.
This quilt has a very specific Christmasy name. Look at the top carefully and then tell me what it is. You'll get extra credit points.
10 comments:
It turned out really great! I think I see big stitch quilting with red pearl cotton! :c) As far as name goes...ummmmm....I'm not good with names.."red alphabet sampler with green border" is what comes to mind! *LOL*
Bonnie
Hee hee! How about No- "L", LOL!!
it looks great and untill i read Cathi's comment I didn't notice the missing 'L' it was the first letter you did too, but perhaps you could use it as a twist for the name,
'looking for L'
'truanting L'
I thought that "No-el", Noel as in Christmas WAS the twist on the name for the quilt! That is what I was trying to say, anyway!! Am I right Tonya? or just terminally confused?? was that the name you wanted us to guess...you did say it was Christmas-y, right?? Okay, I'm going to bed now, LOL, I'm too confused!
Cathi
Spectacular Tonya..I love it..and am quite amused by the No-L idea...LOL.
I was thinking Letters to Santa..but like what Cathi came up with.
So sorry about the continuing headache, and the switch to asprin. I have knee trouble also, they are for the birds ! Hang in there girl !
Cathi got it - the name is indeed Noel. What can I say, I have a fondness for visual puns, tho this is the first quilt I've made like that. Finn's idea of "Letters for Santa" is awfully cute tho.
*LOLOL* No L!!! How funny! I never noticed it was even missing! :c)
Bonnie
Whhhhhhhhaaaa? What is this thing now we have to type in the funny word when we want to post comments? When did this start?
sorry, Bonnie, you were too fast. read the latest post. since I last checked, I've gotten and deleted a spam comment on my own blog. better not get another one now that I've changed things.
Post a Comment