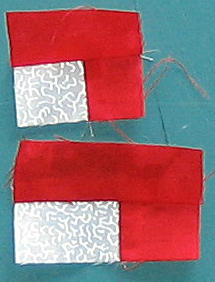
 Next step is to add a wider bit of b-fabric to the upper section. Add what will be the lower part of the letter to the bottom section.
 These two sections are then joined and added to the widest strip of letter fabric.
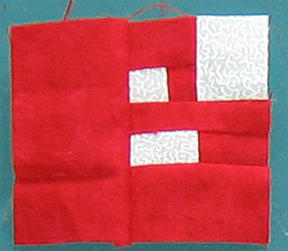
Sometimes I'm not sure if I'm explaining all of this well enough. I learn and figure things out from looking at pictures, so I have a tendency to think that everyone learns the same way. Let me know if I need to explain things more than just show them.
2 comments:
I think you are doing great, on the explaining and on the samples. I'm thrilled to be seeing this done and read the method.
AND..thanks for the links on the side and the mention *VBG* I've gotta add links to yours, Bonnie's etc and have found you getting high praise over on the emblishing bloggers sites ! VERY high praise *VBG*
Love the little birds one, turkey feathers, and Tie One On..
This is so much fun !
Tonya as you saw I am finding your instructions fine, like you I like to see pics, thanks for doing this and taking your time,
it's my mum's birthday later this month so I have started another group of letters to make her a little happy birthday quilt,
thanks for the link, I know what you mean about html, I have dificulty with it and was surprised I 'actually' got it to work on a recent post, after only 2 tries!!!
Post a Comment