Here's how to improvisationally piece a house. No templates, no stress.
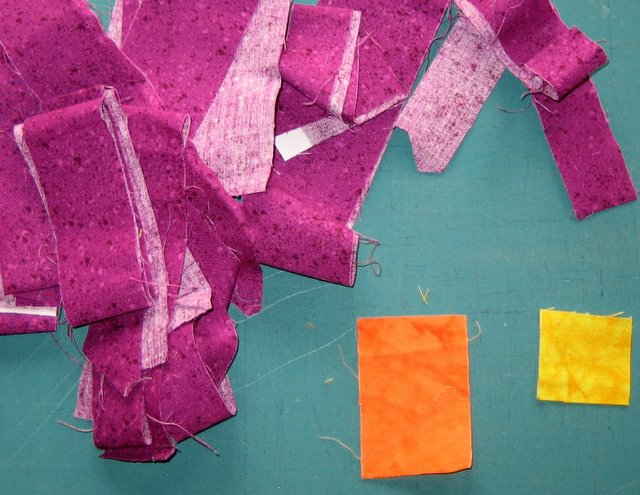
Cut a couple different widths of your house material (I've got way more than that cut, but you don't have to) with the max width approximately 1.5". These don't need to be long strips.
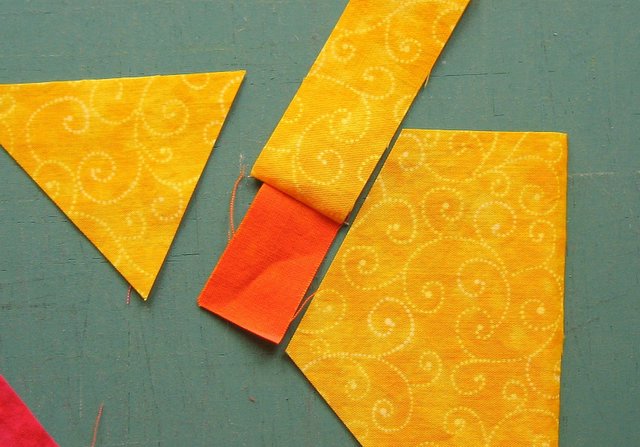
Next cut out a rectangle for a door and a square for a window.
 Sew some house fabric to the side of the door and above the window.
 Okay, more house fabric on the other side of the door and below the window.
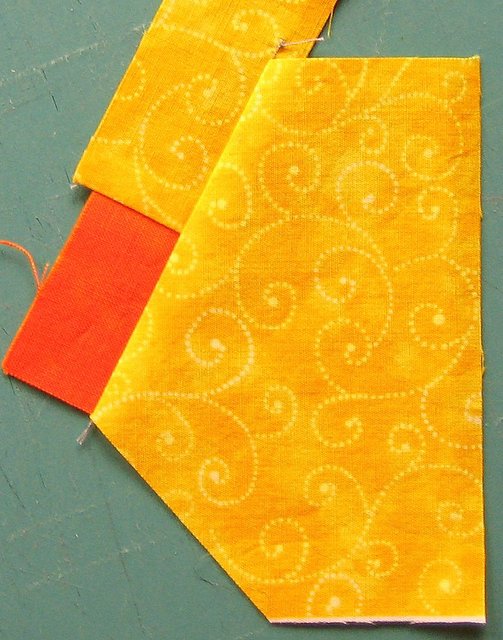
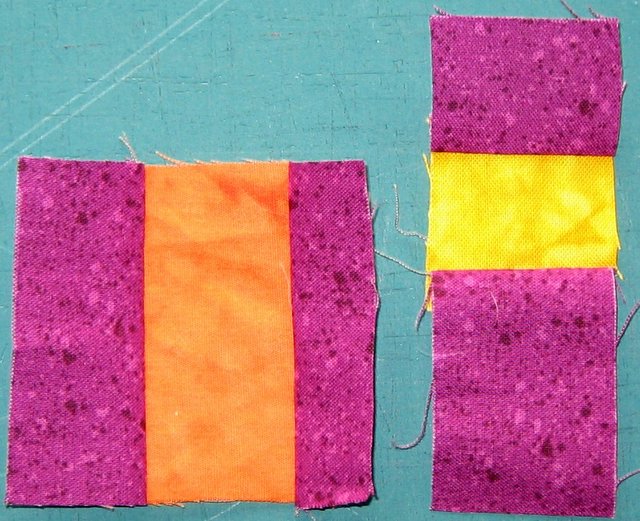 And some fabric above the door:
 Attach the two units together.
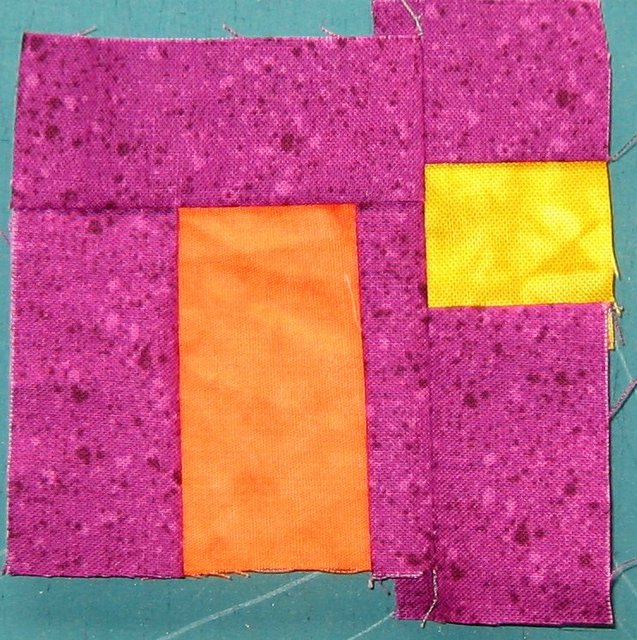 Trim it even and add house fabric to the side.
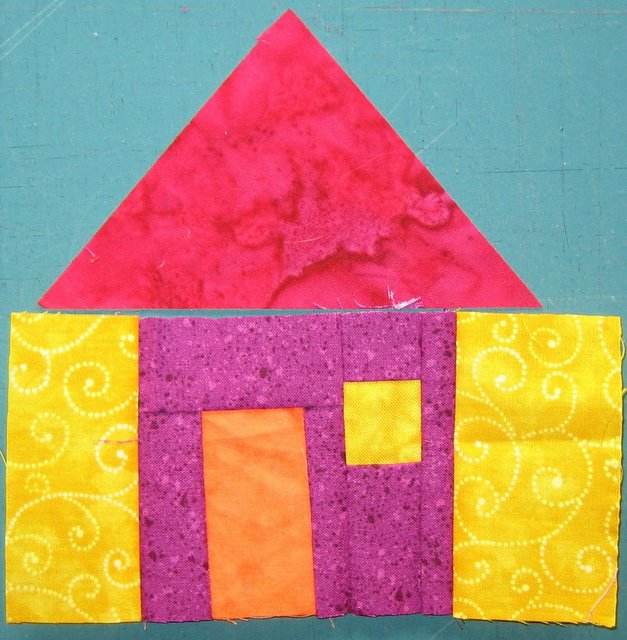
 Add some sky fabric to either side of the house.
 This is a quicky roof. Lay the bottom of the house on top of the roof fabric, leaving a corner of the roof sticking out. You want about an inch of roofing on either side of the house. Slice the roof triangle off.
 I shaved the sides of the roof down a tiny bit so that I didn't have such a strong 90 degree angle.
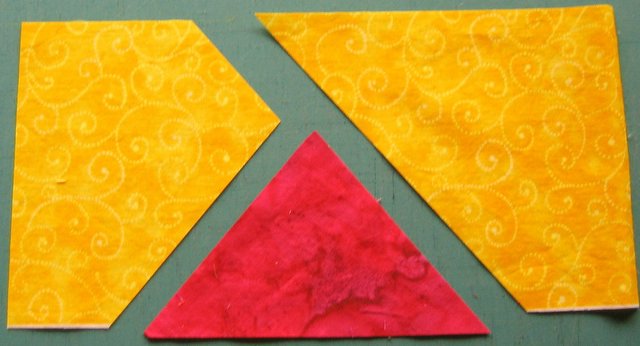
 The next step is to cut out a rectangle of sky fabric. It needs to stick out about an inch farther on either side from the edges of the house block. And it needs to be a couple of inches higher than the peak of the roof.
 Lay your ruler on top of the roof and slice all the way across the sky rectangle. Set it aside.
 Then cut the other side in the same manner.
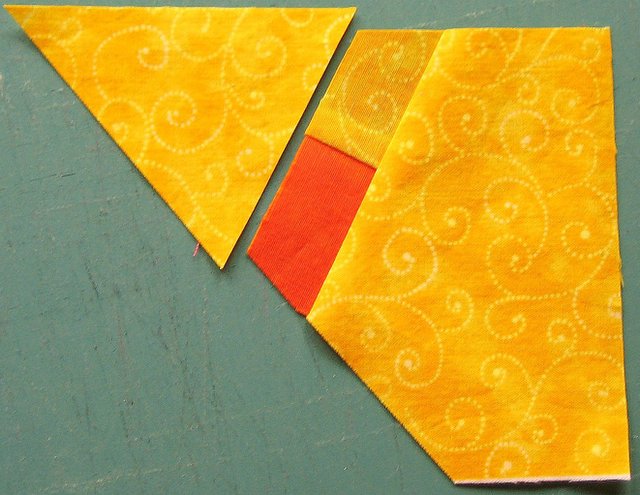
 You should now have two pieces of sky vaguely shaped like this (plus a sky triangle that you can use as a roof on a different house):
 Now make a slice thru the bigger triangle for a chimney.
 Pick out a rectangle or square for your chimney and sew it to the end of a sky strip. This works much easier if you leave the strip long.
 Attach the chimney strip to the larger bit of sky.
 Trim it even and then add the smaller triangle.
 Meanwhile, attach the roof the other side of the sky.
 Trim the excess sky off (this will either be at the top or bottom of the roof, depending on how you added the roof. Either works).
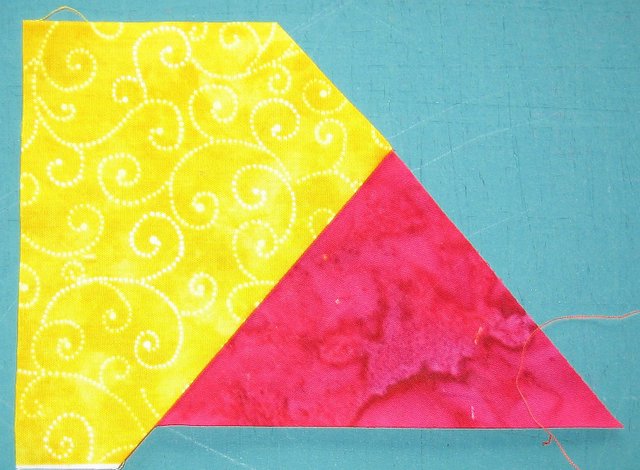
Then sew the chimney section of sky onto the roof section. Trim even. This is terrible to admit, but I got so carried away with sewing, that I forgot to take a picture of the roof with both sides of the sky added. D'oh. Anyway, you can figure that part out.
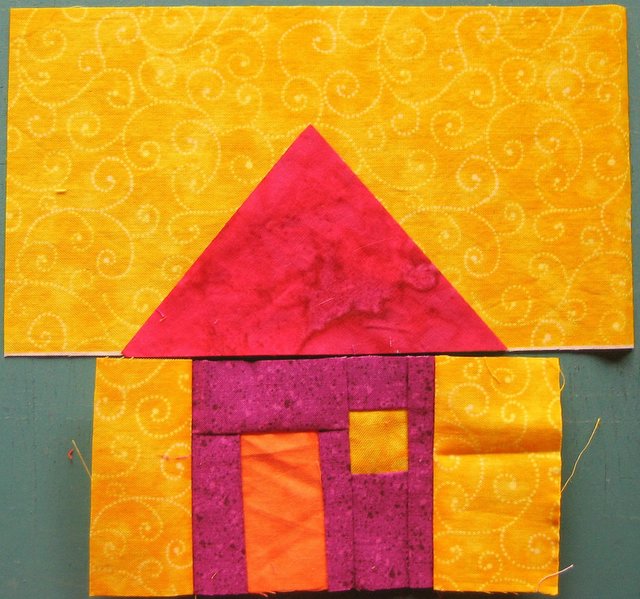
Sew the sky section onto the bottom house section, trim it up, and you should have something along the line of this:
 This is just the most basic of houses. There are so many different variations. You can change the number of windows, the side of the house they're on, etc.
One of my favorite ways to build a house is to take a look at a house block that I like and try to follow the blueprint. My house never looks the same as the original, but it gives me a direction to go in. I've got loads of examples of house blocks in both my blog and my pages on Quiltville. Take a look.
12 comments:
Kewl, Tonya! What fun to make -- makes me want to run upstairs and throw one together right now!
I love this series of teaching photos you have been doing lately!
what fun and a great reminder to play and enjoy the creative process
Wow! I'm so impressed with the number of pictures you took to illustrate the house lesson. Thank you for doing that Tonya!!
Great house by the way..*S* I was laying in bed last night thinking about long, tall houses. I suppose by long I really mean tall, tall Jack Spratt houses...very lean..LOL
Another eye appointment today to check the progress..which seems good to me, the progress I mean..LOL
I'll be back..gotta go see your houses at Quiltville..*G*
Tonya, your willingness to share and teach others is fabulous. I've read your blog from start to finish now and enjoyed myself immensely. Even though your style of quilting and choice of colors is way different than mine you've given me lots and lots of new ideas. Thanks so much for taking some of your precious time to share!
I just finished season 5 of Buffy and loved it. Can't wait to see season 6. I haven't watched Angel because I didn't really like his character on Buffy, but maybe I'll have to give it a try. Especially when I run out of Buffy to watch!!
Thank you so much for sharing this! I can't wait to get started!
whatta cool house. Thanks for the pictoral.
Remember the first time I met you was at your house class...silly me showed up with a bag of light pinks and blues...what was I thinking! I really wanted one of the halloween house quilts! Something else new to start! Thanks for the instructions again.
A house for everyone. I continue to appreciate being reminded that one can trim pieces after the sewing -- that they don't all need to be pre-cut to exactly the size needed and then stressing out when they don't fit as my seam was out a 1/16th of an inch! Thanks for the creative push
Another great tutorial. Thank you so much for sharing all your techniques.
Your instructions were so clear! I just made 9 blocks this afternoon. They're brown with a green roof - "mud huts" :-) Very fun to do! Thanks :-)
Wow, your work is wild, whimsical, and wonderful. So glad I stumbled onto your blog. Thanks for the inspiration!
Dawn in Milwaukee, Wisconsin USA
Post a Comment