Draw the shape first. In this case, a teapot. I drew this from memory so it's simple and folk arty. The drawing doesn't have to be perfect, just recognizable. I bet you all could tell this was a teapot.
 I then layed tracing paper over the top of this drawing and started figuring out how it would be pieced. The first step is to make the big divisions. That was fairly easy here - the spout, the body, the handle. [You can see a faint ghosting of the drawing underneath this, but it just wouldn't scan properly, so you have to use your imagination.]
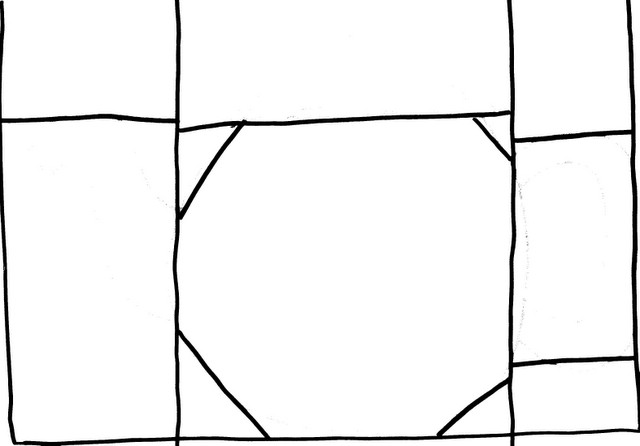
Use straight lines that divide the space entirely. No y-seams.
 Now you can start dividing up each of those spaces. Again, the lines all have to connect to something. Unless you want to be really daring, curves get drawn as straight lines too.
I now have a line across the top of the spout. The main body of the teapot is here, and the top and bottom of the handle are delineated.
 It's not going to be easy to piece, but I have a spout marked off. I've simplified the lid of the teapot a great deal. And there's a handle as well, done in the classic sideways U shape.
 Decided to have a second go, this time making a much easier spout. I also decided to make the handle a great deal curvier.
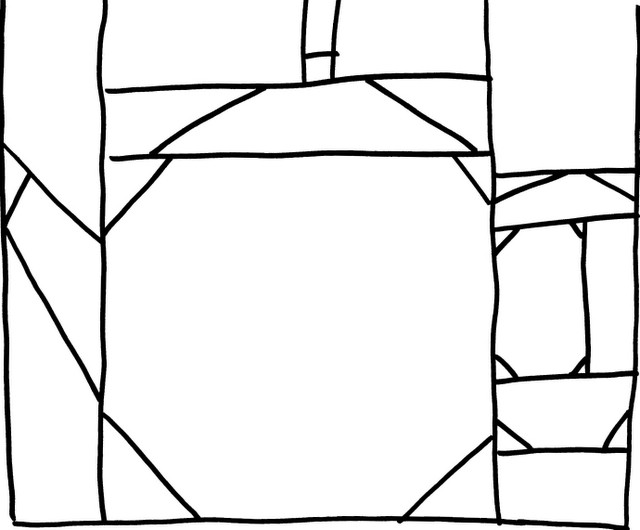 To help you see it, here's the teapot:
 And this is how it looks pieced, using the drawing as a rough guide. When you start piecing from your drawing, you start sewing from the very smallest bits and do the longest lines (seams) last.
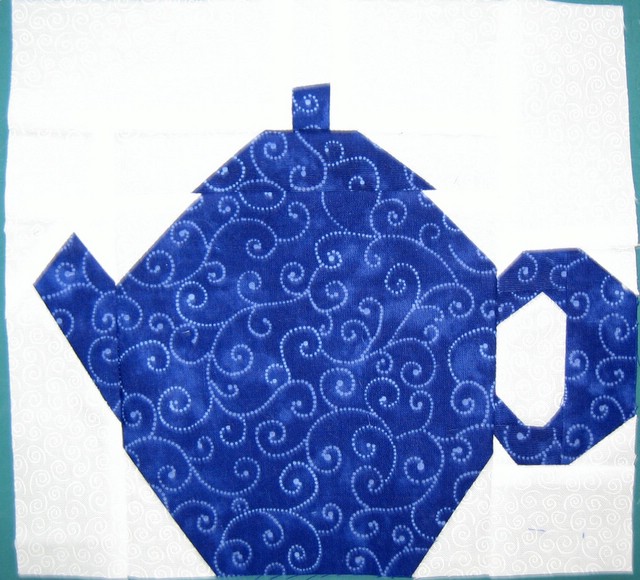 Now if you're one of those people who say, but Tonya, I can't draw.... First I say, yes you can. You all can. But okay, just to break the ice, you can try it like this. Take a picture of whatever it is you want to piece.
I actually found a beautiful teapot pic on Kathie's new-to-me blog Threadlines. [Very fun blog, go check it out. I love love love her Christmas teapot - it's a hoot. She's been doing some fun improv mile-a-minute blocks lately that are wonderful.] I printed a copy of the picture and drew lines on it using my trusty Sharpie.
 I then proceeded as I did before. There's an extra boo-boo line in the handle - ignore it.
I'm afraid I made this overly complicated. I would have to piece parts together first, which would then get pieced together. Yick. More complicated than I like to work. So I think I'd have to draw this out again before I actually worked from it.
Now I advise using these drawings as guides. But it is actually possible to cut them apart and use the pieces as templates. Lay the paper down on top of your fabric and cut with an overly generous quarter inch around. Then piece together, knowing it's NOT going to look exact.
I hope I've shown you that you can do this too. Whatever you want to make, you CAN make. Please try it. If you get in a jam just give me a shout - I'd be happy to help. I'd consider it a challenge.
If you're not happy with how the first block turns out, then make more. Lots of times you just need a bit of practise (oh that word again) to get comfortable and loose.
11 comments:
Thanks for the tutorial on drawing more complicated bits out -- I keep being enticed to paper pieceing, but can't find a pattern I like. Your drawings give me an idea of how to proceed
Hey Ton, love the tea pot....so many possibities!! I had notice what a charming pot you had in your post about making the tea cups.
Hope there is going to be more than one teapot in the future!!
I think it's a marvelous tool to get any of us liberated piecers to see the potential in making the drawing to use as a breakdown guide.
How about bring Libery Blossoms back for an oncore???? *VBG* It's almost the 4th
This is a great techinque!! Good teapot! I saw a lady do this once with a train! You can take almost any picture and break it down into straight lines!!
The quilt is looking good too! I like the roundness of the teapot too. Looks more authentic! hugs, judy
What a great teapot photo! And the tutorial is pretty spiffy too. LOL
Yes, yes, yes. really clear now. I want to try some of my applique patterns.
The tutorial is great. I hope it will be in the book too. It inspires me to try some other pieced projects in future wall hangings. I like the look better than fusing and it remains soft, while fusing ends up a bit stiff.
Thank you so much for this! I've been thinking about a new quilt project that needs a special center to set off the rest of the quilt, and I think this is exactly what I needed! Thank you very much!
What a smartie pants you are!! You know, there are people in this world who know a whole lot, but seem completely incapable of conveying it- you are NOT one of those people!! You do such a great job of making something that could be very intimadating look like a whole lot of fun! I came here without the slightest inclination of making a teapot- and yet, I need to go do this!! Now to figure out another "simple" shape- that I could draw a recognizable representation of! By the way, I love your liberty tea party!
Excellent tutorial -- I agree with Joyce, it should go in the book. :-)
fantastic lesson Tonya...now I would say I can't draw, but, I could do this! thanks!
Um yes, my roll of calico was a great investment!
What a cool idea to use a photo and then draw lines all over. NOt too complicated of course!!
Post a Comment