I'm starting with the capitals, moving from the easiest letters to the hardest. I'll provide dimensions just to give you some place to start. The letters will come out to roughly 3" or 4".
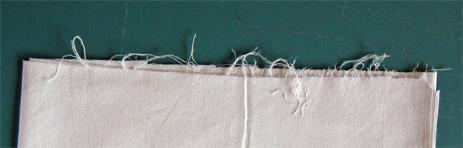 The first cut I take out of my fabric is usually about 2" from the edge. I don't want to waste a bit of it. This first piece usually gets cut into quarters and sometimes even smaller so that all the edges are straight. I only cut off frayed bits (or the nasty white lines you can get sometimes with torn fabric).
 Here are my strips.
Cut several strips of varying widths from each fabric. Try to do this without measuring too much: a consistent size throughout the strip isn't a biggie. I am the queen of the V-cut strip, I assure you. Just cut the strip in half, or quarters if necessary, so that you're not trying to sew with a strip that has a peak or dip in it.
In fact, you may want to make deliberately angled cuts. I like the look myself. The two red strips at the end are angled cuts running from something like 3/4" at their narrowest to 2"-ish at their widest.
The widest strip should be cut roughly between 1 1/2" and 2", and the skinniest about 7/8" to 3/4", and another strip somewhere in between. You can cut more than three different width strips if you want to.
If you look at my first sampler quilt, I think the widest strip I cut was about 1 1/2" - I didn't start using wider strips until later quilts. If you want your letters to be more consistent, then go for the narrower size. For the red and white sampler I'm working on, I want to have really wide and then really narrow sections of the letter, plus the occasional inbetween, so I'm not going wild with intermediate sized strips. For the big bed quilt I had a range of letter strips that graduated in size by 1/8" plus several angled cuts.
The letters T, I, and H
Examples of these letters can be found at the end of this post. Poor planning on my part, sorry.
To make the T, cut a chunk of letter fabric (from now on refered to as l-fabric) about 2" long and sew it lengthwise to a background fabric (b-fabric) strip. Cut the strip so that it is even with the letter fabric. I've illustrated this with a rotary cutter ruler, but I use scissors.
Always whack off any extra so that the longer bit is even with the shorter bit. This cut can be an angle, it just has to be relatively straight.
Now add this pieced bit to another strip of b-fabric, with the l-fabric in the middle. Then whack it even.
Follow the same procedure for the I, keeping in mind that the middle section will need to be a bit narrower than the one you made for the T. I don't want things to always be consistent, so on my I, I've added more b-fabric on one side than on the other.
 Finish the T by sewing this unit onto an l-fabric. Do that and then do that again for making an I.
An H is made exactly the same as an I, but I wanted to show an alternate method for making it, using strip insertion. If you don't want to play with angles, you don't have to.
For this one cut a section of b-fabric about 3" long. In roughly the middle, make an angled cut. You're going to sew the strip in between those two sections. You'll see that I have the l-strip placed closer to the lower half, beginning on the left side and that the l-strip angles OUT from the sections. When pieced, there will be extra sticking out. If I were to sew from another spot, I might end up with the letter fabric angling in, meaning I'd have to seam rip OR make the unit narrower.  So sew the l-strip in, then even up the edges on both sides. There is a picture of that after this next picture. (Sorry, thought I had all the pics in the proper order, but I obviously really didn't.)
Then to add the next bit of b-fabric, you must give yourself a 1/4" overlap so that when you open it up, the edge is all straight. If you do it wrong, you'll immediately understand what I mean. Sometimes doing it wrong (several times) is the way to finally learn that lesson. It's not like the world is going to end. You can whack something off at an angle.
Anyway, it should look something like this when you attach it.
 And this is the bit that should have been above, the evening up process:
 Anyway, the slanted bar H is finished the exact same way as the I.
And here all the completed letters. I'm impressed with what a good photo I got of these. I didn't want to get out the iron, so I zapped the letters with a spray of water to get them to lie flat, and I can even see the water blotches.

Clear as mud?
4 comments:
Thank you for the step by step instruction...very helpful. I made a capital letter "T" today. I am going to try some strip piecing for some of the sections of various letters. For instance, sew backgound fabric, letter fabric then background fabric. That can be cut into segments to be used for central part of certain letters...such as the T, I and H. Other strips will have just the L fabric with the B fabric for the edge pieces of the letters. Does this make sense? I have a blog site but do not know how to upload photos. I tried to take picture with my digital camera today and the camera said there was an error with the card??... So no luck there. Oh one more thing, I tore my strips instead of cutting them.
Catherine, my only thought on strip piecing sections to then chop into letters is that you'll have less variety in the letters. But if that's okay with you, that's okay with me.
Sorry, to hear you don't have pics posted. I'm fairly technologically illiterate, so no help with the camera ordeal except to suggest reinserting the card and checking your manual.
One thing to to be aware of with tearing your strips is the wobbles you can get in the strip. When the fabric all by itself won't even lie flat, then that can just get compounded into more and more wobbles as you sew.
wow, I am sew pleased Mary Frances Main posted your blog and quilt mavericks on her blog,
I'd like to join the alphabet sampler class please,
loved your quilts, thanks so much for sharing,
now I am up to date with your blog and it's mid morning but i have done nothing except read bolgs I had better leave the computer and get some of the H work out of the way so I can start my alphabet ;o)
thanks Tonya
Frances, welcome to the sampler class. It's obviously very informal, just yell if you have questions. I'll keep an eye on your blog to see what your letters look like. Course I have to start your blog from way back in January, so it's going to take me awhile to work my way up to now.
Post a Comment