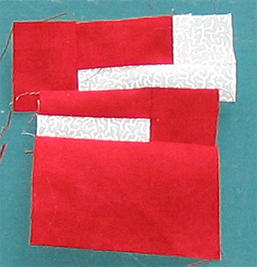
Sew them lengthwise to the skinny b-fabric and trim.
[*** If you want, on one of the l-fabric rectangles, attach a bit of b-fabric so that the top part of the S won't extend all the way to the side of the letter. Don't have to do it, but I like the extra little touch it adds. If you have added the extra, better made sure that you that you sew the b-fabric so that it will be underneath that section.***]
Now you are going to sew these two sections onto a strip of l-fabric. I like to use the medium size so I can play with it, esp if I've added the extra doohickey on the top. If you've done the extra bit of background, the sections must be attached as in the following picture. If all you're attaching to the strip is b-fabric, you know you've got it wrong. Whether you have the extra bit or not, the sections have to be added reverse of one another, as follows:
 This is what you get when you trim and then turn the lower section around. You can adjust where you sew them together. Sew this together:
 The last step is to add l-fabric at the bottom. I haven't trimmed up my unit yet, because I'm not sure if I want to turn it at some kind of angle or slant the side. I'll decide that after ironing.
 On a final note, there are different ways of making the S, this just seemed like an easy one to explain. Would have been easier if I hadn't added the extra bit - d'oh, now I think of it. Briefly considering remaking the letter and immediately disregarding that foolish notion.
No comments:
Post a Comment